Build a branching scenario
A scenario lesson lets learners make choices that lead to different scenes and endings, instead of moving through content in a straight line. Each scene shows a situation, asks one question and offers a few answers. Each answer takes the learner to another scene or to an ending.
Before you start
Give a lesson the type Scenario on the Lessons step: click the type pill under the lesson title and pick Scenario from the Lesson type menu. Or use a lesson that already has that type. A scenario lesson opens its own editor instead of the block editor.
A scenario works best when the learner has to decide something and live with the result: handling a suspicious email, a difficult conversation with a customer, the first minutes of an incident. If you only want to check what learners remember, a quiz lesson is the better tool: see Build a quiz lesson.
Plan the story first
Sketch the story before you open the editor.
- Pick one situation and one role for the learner, for example an accounts assistant who gets an unexpected invoice.
- List 3 to 6 decisions the learner has to make. Each decision becomes one scene, and each scene asks exactly one question.
- Decide on 2 to 4 endings, for example one where the threat is stopped and one where it is not.
- For each decision, write 2 to 5 answers and note where each one leads. An answer may also lead back to an earlier scene: loops are allowed.
The editor enforces these limits:
- 2 to 40 scenes and endings in total.
- 2 to 5 answers per scene.
- Title: up to 200 characters. Scene text: up to 5000. Question: up to 300. Answer: up to 200. Feedback: up to 500.
Choose the mode
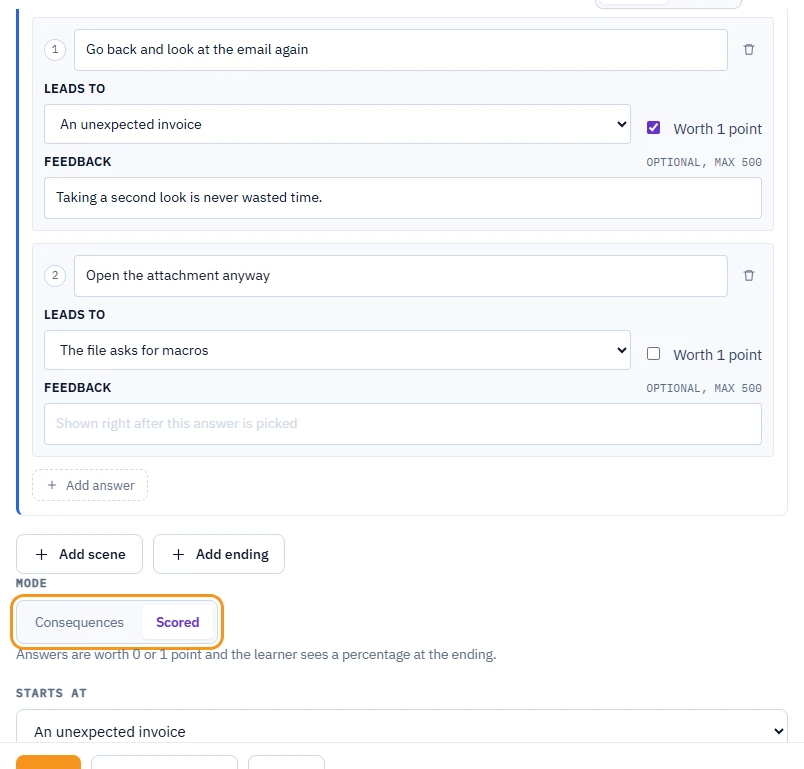
The Mode switch sits below the scenes and applies to the whole scenario.
- Consequences (the default): answers carry no score. The learner sees where each choice leads, and reaching an ending reports 100% to the LMS.
- Scored: each answer is worth 0 or 1 point. At the ending the learner sees Your result as a percentage of good decisions, and that percentage is the lesson's score in the LMS.
In Scored mode every answer card gets a Worth 1 point checkbox next to Leads to. Tick it for the good choices. After switching to Scored, every answer starts at 0 points until you tick it. Switching back to Consequences keeps the ticks but ignores them.
Write scenes
- On the Lessons step, click Edit next to the scenario lesson to open the scenario editor. A new scenario opens on the Generate with AI tab. Switch to Write scenes to work by hand. It starts with one empty scene, Scene 1, and one ending, Ending 1.
- Check Starts at. It sets the scene the learner sees first; only scenes, not endings, can be picked. The start scene is marked start on its card.
- Fill in the scene card:
- Title: a short name; it also appears in the Leads to lists.
- Scene text: what the learner reads. The field takes simple HTML, for example
<p>paragraphs with<strong>or<em>; there is no formatting toolbar. - Video URL (YouTube/Vimeo) (optional): a video above the scene text. The question stays hidden until the video ends, but the learner can click Show the question now.
- Image (optional): Upload image adds a JPEG, PNG, WebP or GIF of up to 2 MB above the scene text; Remove image takes it off. See Images, files and media limits.
- Question: the one decision this scene asks for.
- Fill in the answers. For each one, type the text the learner can pick, then choose the target in Leads to: another scene or an ending (endings are listed as Ending: followed by the title). Add answer adds one more, up to 5; the bin icon removes one.
- Optionally add Feedback to an answer. It appears right after the learner picks that answer, with a Continue button, before the next scene opens: a good place to explain the consequence.
- Click Add scene for each further decision. A new scene comes with two placeholder answers that lead to the start scene; change them. Use the copy icon (Duplicate) to copy a scene with its answers, or the bin icon (Delete) to remove it. Answers that led to a deleted scene lose their target.
- Click Add ending for each ending. An ending has a title, text and an optional video or image, but no question and no answers. Set its Outcome to positive, negative or neutral. The outcome only helps you keep track in the editor; learners do not see it.
Check the graph
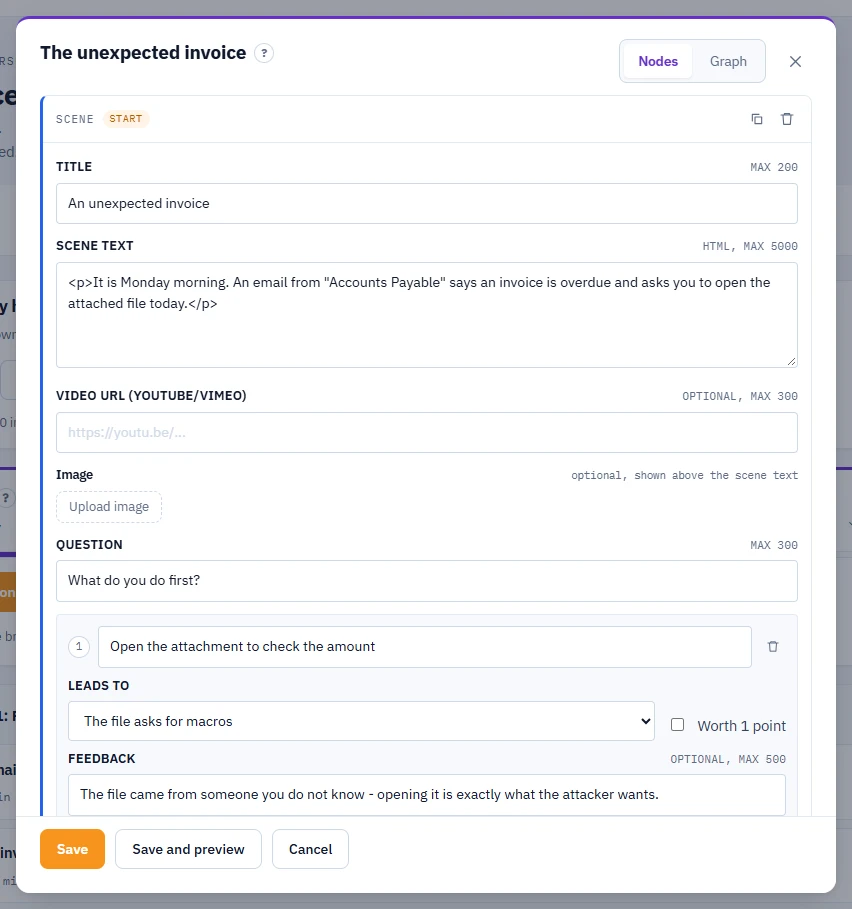
Click Graph at the top of the editor to see the whole story as a map. Nodes takes you back to the cards.
- Each column shows how many decisions a scene is from the start. The start scene is in the first column and is marked START.
- Arrows show where the answers lead, including loops back to earlier scenes.
- E marks an ending, V a scene with a video and I a scene with an image.
- A grey scene cannot be reached from the start: no answer leads there.
- A red outline means the scene still has a problem that blocks saving.
- A red dashed stub is an answer with no target.
Click any scene in the graph to jump to its card with the title field ready to edit.
Generate with AI
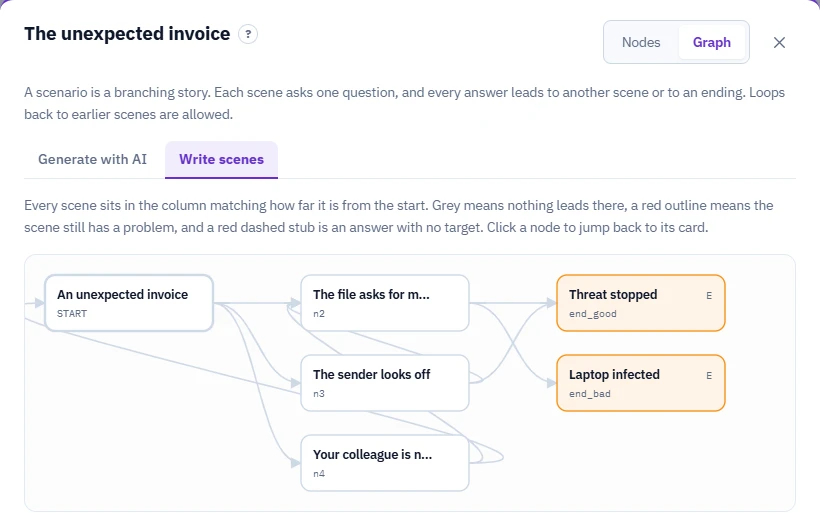
- Open the Generate with AI tab.
- In What is this scenario about, describe the scenario in one or two sentences, up to 500 characters. Name the situation, the learner's role, the goal and the tone, for example: "An accounts assistant gets an unexpected invoice email. Goal: recognise phishing and report it. Calm, realistic tone." While it is empty, a warning says the AI prompt will be generic.
- Click Generate prompt, then Copy prompt, and run the prompt in your AI chat. The prompt uses the lesson title, your course brief and any source material, and asks for 6 to 12 scenes, 2 to 4 answers per scene and 2 to 4 endings, in the course language.
- The prompt asks for Consequences mode unless you ask for scores. If you want a Scored scenario or a different size, say so in the chat, for example "Use scored mode and make it 5 scenes".
- Paste the JSON answer into Paste the JSON from your chat and click Import. If the editor already has content, a Replace the scenario? window asks first: importing replaces everything in the editor.
- The editor switches to Write scenes. Read every scene, fix what does not fit and add images yourself; the import brings none.
Save, preview and what the LMS sees
- Click Save, or Save and preview to play the scenario from the start, the way learners will. Cancel closes the editor without saving.
- If something blocks saving, a red panel lists the problems. It appears after your first click on Save or Save and preview, and items disappear as you fix them. Unreachable scenes are listed as warnings and do not block saving.
- Once saved, the lesson is marked Ready in the lesson list.
While playing, the learner can click Start over at any time. In the exported SCORM package a scenario lesson reports like an interaction lesson:
- Every decision is sent as an answer: the question and the chosen answer. In Scored mode it is also marked correct or incorrect; in Consequences mode the result is neutral.
- Reaching an ending completes the lesson, with 100% in Consequences mode or the percentage of good decisions in Scored mode.
For the exact data, see What your LMS will report.
If something goes wrong
- A scene is grey in the graph or listed as a warning: no answer leads to it. Point an answer to it in Leads to, or delete it.
- An answer points to unknown node: the answer has no valid target, usually because its scene was deleted. Pick a new one in Leads to.
- An ending node must not have a question (or answers): this comes from pasted JSON. Remove them from that ending in the JSON and import again, or rebuild the ending with Add ending.
- No ending node can be reached from the start node: make sure at least one path of answers from the start scene ends in an ending.
- Scenario must have between 2 and 40 nodes: split a very long story into two scenario lessons, or add a scene or ending to a very short one.
- The import is rejected: the error says why. Paste the whole answer from the chat, including both braces. If it says the JSON has no "nodes" list, the chat answered in a different format; ask it to follow the prompt's JSON specification again.
- You want to start over: delete the scenes you no longer need, or click Cancel to discard unsaved changes.
Next
Preview the whole course before exporting: Preview your course.